 |
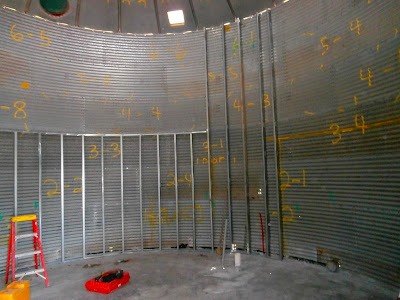
| The tall studs will be where the stairs will be located. |
 |
| Chris cutting out the windows. There is no turning back now! |
 |
| The windows from the outside. |
 |
| The window on the right is over the kitchen sink. |
 |
| The tall studs will be where the stairs will be located. |
 |
| Chris cutting out the windows. There is no turning back now! |
 |
| The windows from the outside. |
 |
| The window on the right is over the kitchen sink. |
 |
| The box in this picture will be the kitchen window over the sink. |
 |
| This is where the cut out for the stair well leading up to the girls' rooms will be |
 |
| The door area will be cut out for access to the rest of the house. And the will be a window on the side too. |
 |
| This is bin number two. This cut out will be for the stair well to the master bedroom/bath. |
 |
| Where the second cut out starts there will be a wall and that area will be the laundry/utility room. |
 |
| Our youngest daughter thinks the concrete is great. She has her own skating rink any time she wants!! |
 |
| This will be the tile on the wall of the kitchen( subject to change , but that is the plan) |
 |
| After cleaning one time with oven cleaner. Oven cleaner is what I read on the internet to be the best at removing some paint and not damaging the tin underneath. |
 |
| After cleaning twice with oven cleaner. I did not think there was yellow under all that green. I'm not sure I like the yellow but we will figure it out later. At least all of the loose paint is off. |
 |
| Two of the other kinds of tile. The white one is the same as the one underneath it. The long white piece is crown moulding. |
 |
| The orange will be a ceiling but haven't yet decided where to put it. The white crown moulding goes with it. |
 |
| After one round of oven cleaner. |
 |
| After the second cleaning. Now just a few hundred more pieces to clean! We are still figuring out if we will end up painting over them or just clear coating them. |
 |
| We put down the 3 inches of foam board and then started putting down the rebar. |
 |
| The rebar is on 12 inch centers and tied at each crossing. |
 |
| We added rebar sticking out of the grain bin and tied it to the rebar inside because we wanted it all tied together when the next portion of concrete is poured. |
 |
| Then we started putting in all of the radiant tubing. |
 |
| Tar was added around the grain bin where concrete would be touching it. The tar will prevent the concrete from making the bin deteriorate too quickly. |
 |
| The final picture of the radiant tubing. Now we just have to wait until it is dry enough to pour concrete!!! |